Part 1 NixOSをinstall
Part 2 deply-rsでNixOS Configurationを適用(👈 この記事)
Part 3 ragenixでsecret管理
Part 4 opentelemetry-collectorとopenobserveでmetricsを取得
Part 5 CPUの温度をmetricsとして取得
本記事はNixOSとRaspberry Piで自宅serverをはじめる記事のPart 2です。
Part 1でRaspberry Pi(以下raspi)にNixOSをinstallしてsshできるところまでを行いました。
本記事ではraspiの設定をflakeで管理して手元のhost machineからdeploy(適用)できるようにしていきます。
実際のsourceはこちらで管理しています。
概要としてはdeploy-rsを利用することでansibleで構成管理するのと近いことができます。
違うのはprovisioningの設定をnixosConfigurationで行える点です。これによりhostのNixOSやMacと同じ設定の仕組みでraspiも管理できます。
NixOSやMacをnixで管理していく方法については以前、Nixでlinuxとmacの環境を管理してみるで書いてみました。
raspiを管理するrepositoryのflake.nixの全体としては以下のようになります。 この設定を理解するのが目標です。
{
  description = "Deployment for my home server cluster";

  inputs = {
    nixpkgs.url = "github:NixOS/nixpkgs/nixpkgs-unstable";
    deploy-rs = {
      url = "github:serokell/deploy-rs";
      inputs.nixpkgs.follows = "nixpkgs";
      inputs.utils.follows = "flake-utils";
    };

    flake-utils.url = "github:numtide/flake-utils";
  };

  outputs =
    { self, nixpkgs, deploy-rs, flake-utils}:
    let
      spec = {
        user = "ymgyt";
        defaultGateway = "192.168.10.1";
        nameservers = [ "8.8.8.8" ];
      };
    in {
      nixosConfigurations = {
        rpi4-01 = nixpkgs.lib.nixosSystem {
          system = "aarch64-linux";
          specialArgs = spec;
          modules = [ ./hosts/rpi4-01.nix ];
        };
        # ... per host...
        rpi4-04 = nixpkgs.lib.nixosSystem {
          system = "aarch64-linux";
          specialArgs = spec;
          modules = [ ./hosts/rpi4-04.nix ];
        };
      };

      deploy = {
        # Deployment options applied to all nodes
        sshUser = spec.user;
        # User to which profile will be deployed.
        user = "root";
        sshOpts = [ "-p" "22" "-F" "./ssh.config" ];

        fastConnection = false;
        autoRollback = true;
        magicRollback = true;

        # Or setup cross compilation
        remoteBuild = true;

        nodes = {
          rpi4-01 = {
            hostname = "rpi4-01";
            profiles.system = {
              path = deploy-rs.lib.aarch64-linux.activate.nixos
                self.nixosConfigurations.rpi4-01;
            };
          };
          # ... per host
          rpi4-04 = {
            hostname = "rpi4-04";
            profiles.system = {
              path = deploy-rs.lib.aarch64-linux.activate.nixos
                self.nixosConfigurations.rpi4-04;
            };
          };
        };
      };

      checks = builtins.mapAttrs
        (system: deployLib: deployLib.deployChecks self.deploy) deploy-rs.lib;
    } // flake-utils.lib.eachDefaultSystem (system:
      let pkgs = import nixpkgs { inherit system; };
      in {
        devShells.default =
          pkgs.mkShell { buildInputs = [ pkgs.deploy-rs pkgs.nixfmt ]; };
      });
}
Raspberry Piの設定
まずはraspiの設定を行っていきます。
{
  inputs = {
    nixpkgs.url = "github:NixOS/nixpkgs/nixpkgs-unstable";
    # ...
  };

  outputs =
    { self, nixpkgs, ...}:
    let
      spec = {
        user = "ymgyt";
        defaultGateway = "192.168.10.1";
        nameservers = [ "8.8.8.8" ];
      };
    in {
      nixosConfigurations = {
        rpi4-01 = nixpkgs.lib.nixosSystem {
          system = "aarch64-linux";
          specialArgs = spec;
          modules = [ ./hosts/rpi4-01.nix ];
        };
      # ...
    };
}
raspiのhost rpi4-01の設定は上記のようになります。
host名はPart 1で設定してある前提です。
設定自体は通常のnixosConfigurationsで行います。
specialArgc = spceを指定することでmoduleからspecのfieldを参照できるようにしてあります。
systemはraspiなのでaarch64-linuxを指定しました。
調べ方としてはnix replを利用しました。
$ nix repl
Welcome to Nix 2.17.0. Type :? for help.

nix-repl> builtins.currentSystem
"aarch64-linux"moduleとして参照している./hosts/rpi4-01.nixは以下のようになっています。
{ defaultGateway, nameservers, ... }: {
  imports = [ ../modules/rpi4.nix ];

  networking = {
    inherit defaultGateway nameservers;
    hostName = "rpi4-01";
    interfaces.end0.ipv4.addresses = [{
      address = "192.168.10.150";
      prefixLength = 24;
    }];
    wireless.enable = false;
  };
}hosts/配下はhost毎の設定を定義しています。
基本的にはPart 1でおこなった設定からhost固有の設定をここで定義しています。
raspiそれぞれで共通する設定はmodules/rpi4.nixに定義しました。
# Common settings for Raspberry Pi4 Model B
{ pkgs, user, ... }: {

  boot = {
    # ...
  };

  fileSystems = {
    # ...
  };

  environment.systemPackages = with pkgs; [ helix bottom bat ];

  # ...
  users = {
    # ...
  };
  security.sudo.wheelNeedsPassword = false;

  hardware.enableRedistributableFirmware = true;
  system.stateVersion = "23.11";
}設定自体はPart 1と同じです。
deploy-rs
続いて定義したraspiの設定をdeployする方法を見ていきます。
{
  inputs = {
    # ...
    deploy-rs = {
      url = "github:serokell/deploy-rs";
      inputs.nixpkgs.follows = "nixpkgs";
      inputs.utils.follows = "flake-utils";
    };
  };

  outputs =
    { self, nixpkgs, deploy-rs, ...}:
    let
     # ...
    in {
      nixosConfigurations = {
        rpi4-01 = nixpkgs.lib.nixosSystem {
          system = "aarch64-linux";
          specialArgs = spec;
          modules = [ ./hosts/rpi4-01.nix ];
        };
        # ...
      };

      deploy = {
        # Deployment options applied to all nodes
        sshUser = spec.user;
        # User to which profile will be deployed.
        user = "root";
        sshOpts = [ "-p" "22" "-F" "./etc/ssh.config" ];

        fastConnection = false;
        autoRollback = true;
        magicRollback = true;

        # Or setup cross compilation
        remoteBuild = true;

        nodes = {
          rpi4-01 = {
            hostname = "rpi4-01";
            profiles.system = {
              path = deploy-rs.lib.aarch64-linux.activate.nixos
                self.nixosConfigurations.rpi4-01;
            };
          };
          # for each node...
          rpi4-04 = {
            hostname = "rpi4-04";
            profiles.system = {
              path = deploy-rs.lib.aarch64-linux.activate.nixos
                self.nixosConfigurations.rpi4-04;
            };
          };
        };
      };
      # ...
}deploy-rsはflakeのoutputsにdeployを期待します。
deploy.{sshUser,user}等は各raspiへのdeploy共通の設定です。
deploy.autoRollbackはdeployが失敗した場合に前回のprofileを有効にしてくれるoptionです。
ここでいうprofileはnixのprofileのことだと理解しています。 deploy.magicRollbackについてはREADMEによるとなんらかの理由で変更後にdeploy対象nodeへの疎通ができなくなった場合に自動でrollbackしてくれる設定です。
deploy.remoteBuildはtrueを設定しています。 自分のhost machineにaarch64-linuxのものがなく、nixのcross compileをまだ設定できていないため、deploy先のraspi上でbuildするようにしています。
deploy.nodes.${node}にdeploy対象のnodeを設定します。
nodeごとにprofileを指定することができこれがdeployの単位となります。profile = roleという感じです。
deploy.nodes.${node}.profiles.${profile}.pathにさきほど定義したnixosConfigurationを指定します。
これでdeployの設定は完了です。
実際にdeploy
さっそく定義した設定をdeployしてみます。
flake.nixのdevShellに以下のようにdeploy-rsを追加します。
{
  inputs = {
    # ...
    flake-utils.url = "github:numtide/flake-utils";
  };

  outputs =
    { self, nixpkgs, deploy-rs, flake-utils}:
    let
      # ...
    in {
      nixosConfigurations = {
        # ...
      };

      deploy = {
       # ...
      };
    } // flake-utils.lib.eachDefaultSystem (system:
      let pkgs = import nixpkgs { inherit system; };
      in {
        devShells.default =
          pkgs.mkShell { buildInputs = [ pkgs.deploy-rs pkgs.nixfmt ]; };
      });
}これでnix develop -c nuもしくはdirenvでdeployが有効になります。
まずは1台にdeployしてみます。
> deploy --interactive --skip-checks .#rpi4-01
🚀 ℹ [deploy] [INFO] Evaluating flake in .
🚀 ℹ [deploy] [INFO] The following profiles are going to be deployed:
[rpi4-01.system]
user = "root"
ssh_user = "ymgyt"
path = "/nix/store/x901jwam6nzwgfxyzy7wa5hahm33fb93-activatable-nixos-system-rpi4-01-23.11.20230920.fe97767"
hostname = "rpi4-01"
ssh_opts = ["-p", "22", "-F", "./etc/ssh.config"]

🚀 ℹ [deploy] [INFO] Are you sure you want to deploy these profiles?
> yes
🚀 ℹ [deploy] [INFO] Building profile `system` for node `rpi4-01` on remote host
🚀 ℹ [deploy] [INFO] Activating profile `system` for node `rpi4-01`
🚀 ℹ [deploy] [INFO] Creating activation waiter
👀 ℹ [wait] [INFO] Waiting for confirmation event...
⭐ ℹ [activate] [INFO] Activating profile
activating the configuration...
setting up /etc...
reloading user units for ymgyt...
setting up tmpfiles
reloading the following units: dbus.service
⭐ ℹ [activate] [INFO] Activation succeeded!
⭐ ℹ [activate] [INFO] Magic rollback is enabled, setting up confirmation hook...
⭐ ℹ [activate] [INFO] Waiting for confirmation event...
👀 ℹ [wait] [INFO] Found canary file, done waiting!
🚀 ℹ [deploy] [INFO] Success activating, attempting to confirm activation
🚀 ℹ [deploy] [INFO] Deployment confirmed.
無事deployできました。
--skip-checksはhostとremoteのsystemが違うと現状だとうまくcheckが動かないようなのでつけています。
これでraspiのnixosConfigurationを反映させられるようになったのでさっそく設定を変更してみましょう。
現状ではtime zoneを設定していないのでこれを設定してみます。
./modules/rpi4.nixにtime.timeZone = "Asia/Tokyo";を追加します。今度は全台に反映させたいので
deploy --skip-checks --interactive .を実行してみます。 成功したらPart 1で作成したzellij layoutを使ってsshしたのちtimedatectlを実行してみます。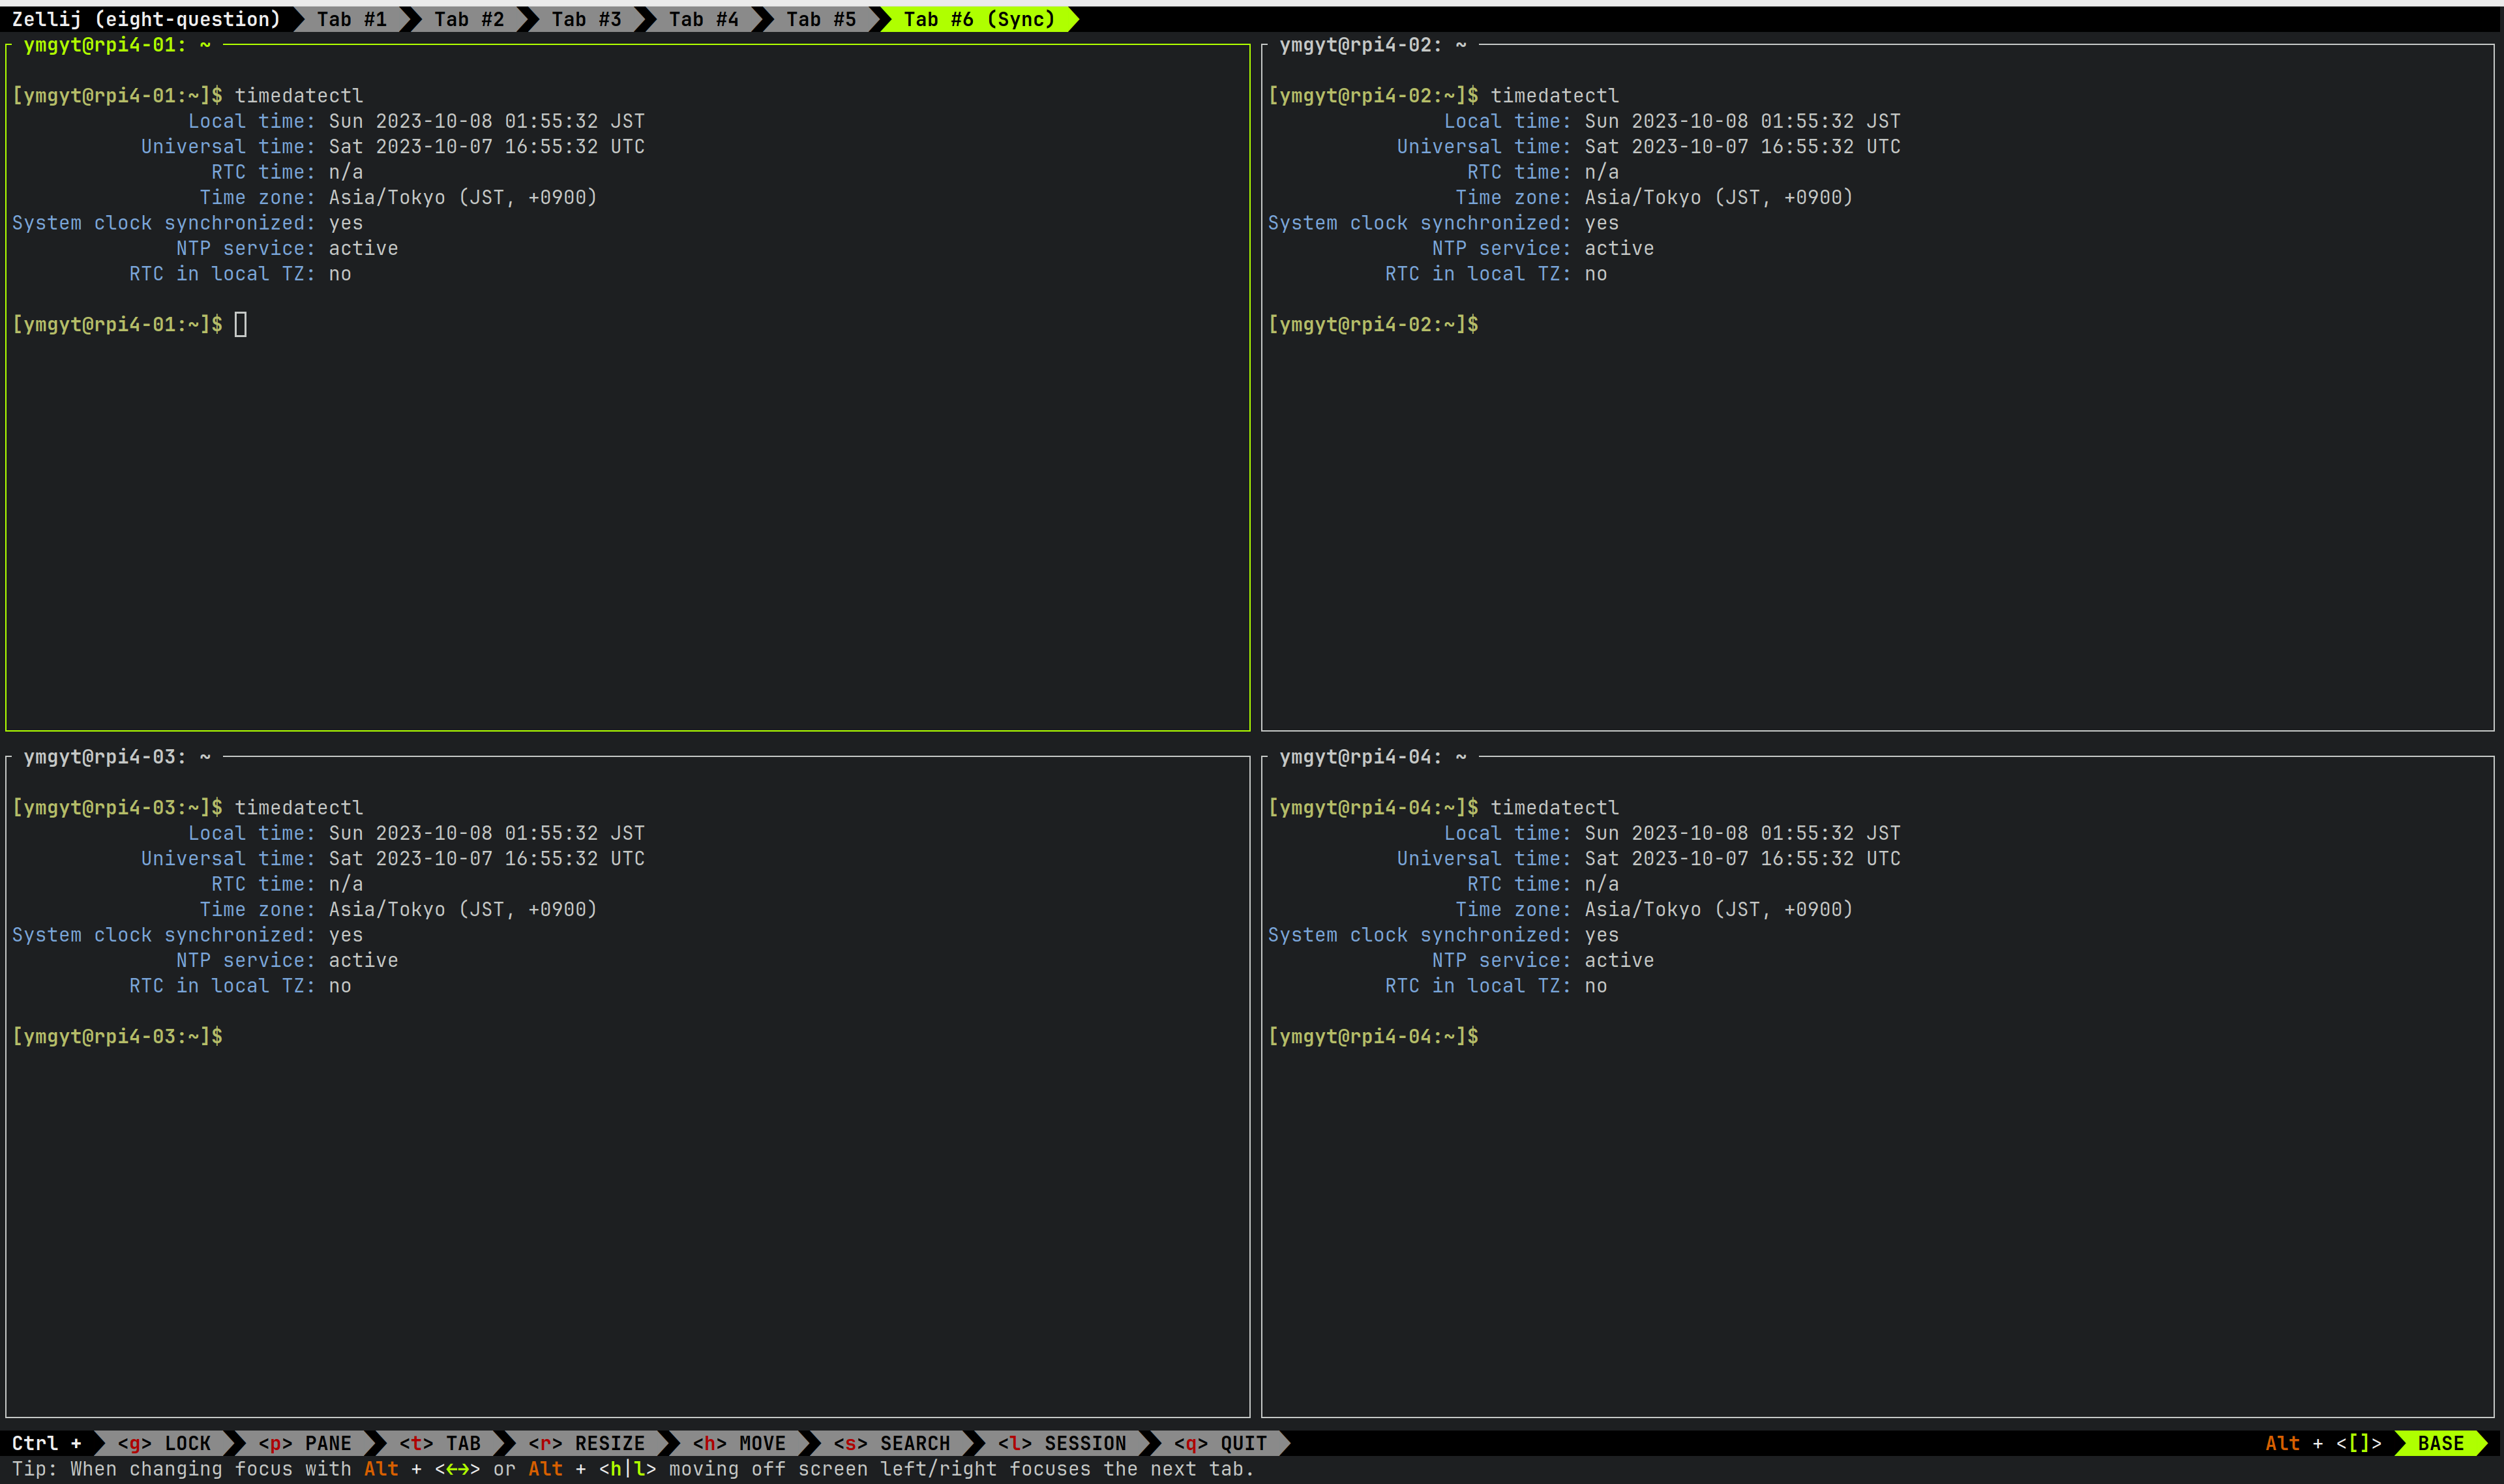
無事、time zoneがAsia/Tokyoに変更されていることが確認できました。
Part 3ではraspi上でserviceを動かすために必要なsecretを管理できるようにしていきます。