現在のdirectory構造を左側に表示する機能は各種editorに一般的に備わっているものかと思います。
Helixにその機能を追加しようとしたPR File explorer and tree helper (v3)は残念ながらmergeに至りませんでした。
自分はこのPR branchを利用していたのですが、更新から10ヶ月程度経ち、masterとの乖離が大きくなってきました。 そこで、Helixをforkして、このPRを最新のmasterに移植して利用することにしました。
本記事ではHelixにfile explorerというdirectory構造を表示するcomponentを追加するうえで必要だった変更について書きます。
そもそもどうやってHelixがfileを表示しているかについては以前、Helixがfileをrenderingする仕組みを理解するで書いたりしていました。
File explorerは下記の画像のdirectory構造を表示している左側のcomponentです。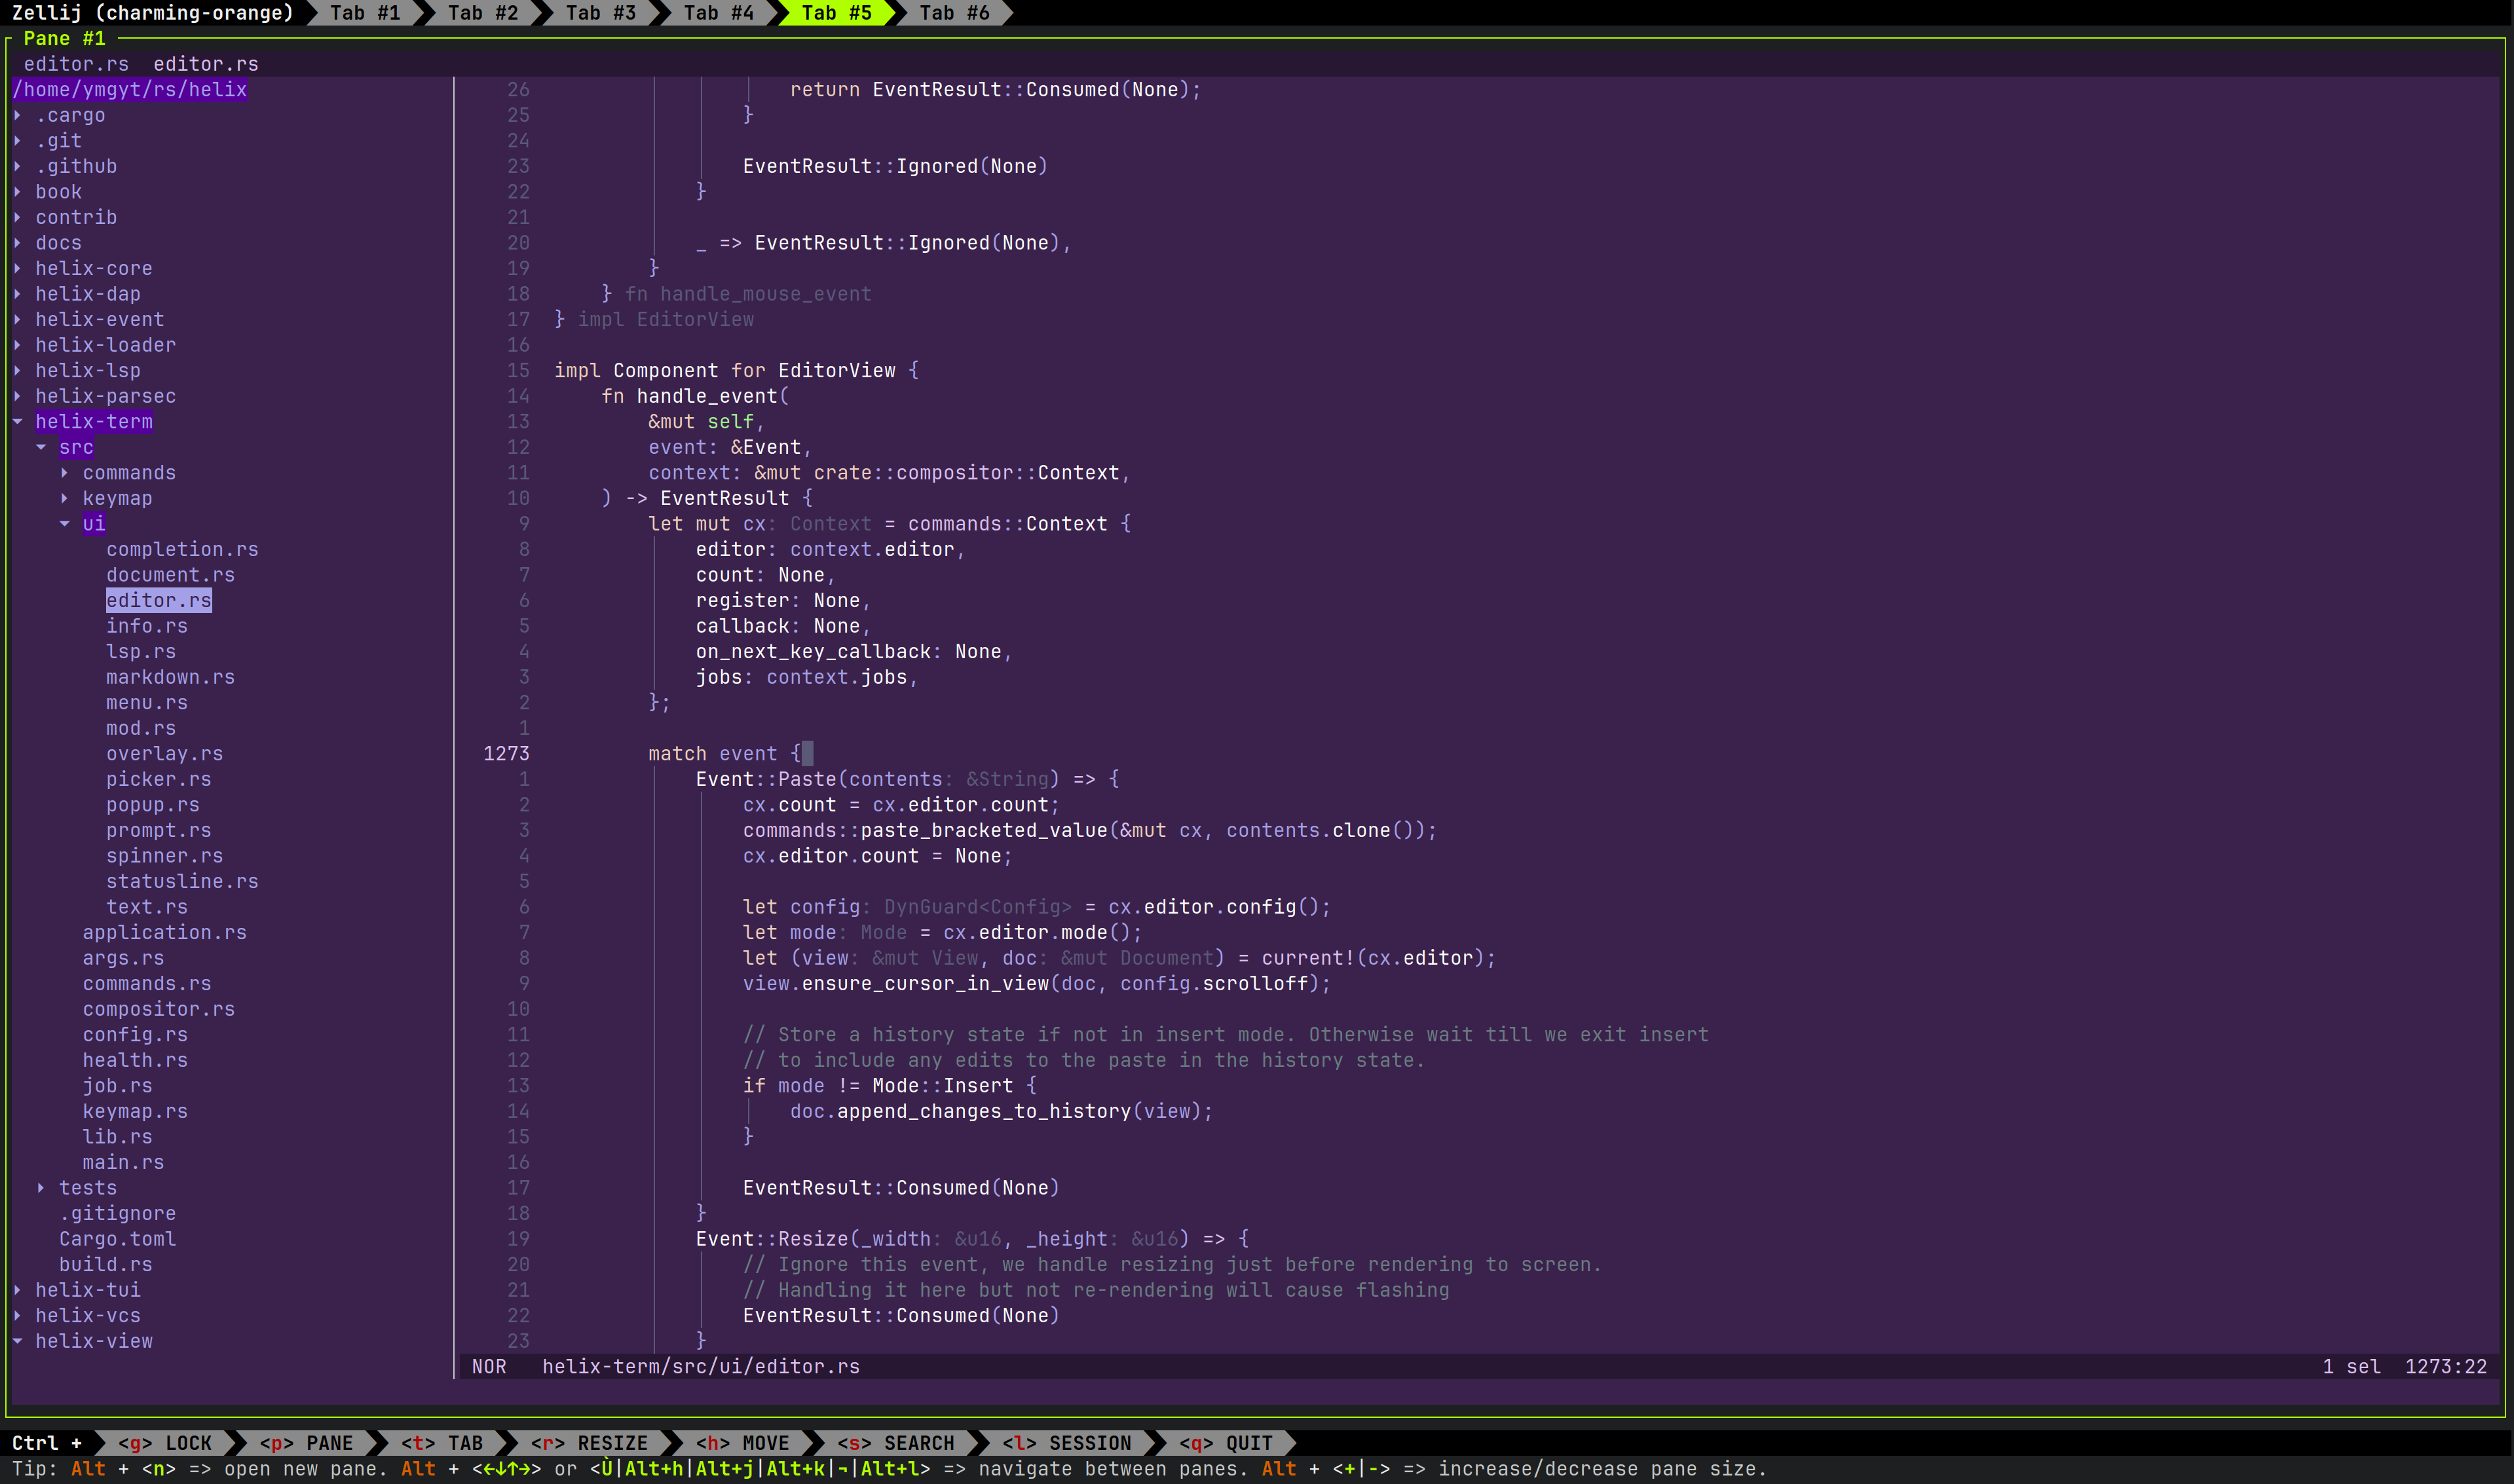
(なお、同様の機能がfile treeであったり、file tree explorerとも呼ばれることもありますが、本記事ではfile explorerと呼びます)
背景
Helixにfile explorerを追加しようという要望は早くからありました。
File explorer and tree helper (v3)のPRができた際はすぐに使ってみて、とても気に入っていました。
しかしながら、最終的にfile explorerはpluginで実装すべきで、Helixのcoreには含めないとの決断がなされました。
A file tree explorer is a big feature and there's a lot of people who wouldn't benefit from it, including the maintainers, who would be "forced" to maintain it. This is precisely where plugins come into play, because they delegate maintenance to plugin authors and they are "opt-in" based.
https://github.com/helix-editor/helix/pull/5768#issuecomment-1722508888
Helixの主要な開発者の一人であられるpascal先生は以下のようにおっしゃられていました。
Utimately different people have different preferences and we can't please everyone. There are a billion different file navigation plugins/tuis around and building them all into helix would bloat it quite a lot and ultimately would not end well.
https://matrix.to/#/!glLuldscRKMQxGWgjZ:matrix.org/$2zxk4ODb-g3lQcKTgRvSnCbC4szNhJxxkGgjO3cOXyQ?via=matrix.org&via=envs.net&via=tchncs.de
Helixではplugin機構は議論されているものの、まだ実装に至っていないので結果的に最新のHelixを利用しつつ、file explorerを使うには自前でやるしかないことになりました。
もう一つの選択肢としてはFile explorer workaround until plugin system arrives #8314 discussionで提案されている、zellijやwezterm等のterminal multiplexer + brootやyazi等のfile explorerを組み合わせる手法です。
こちらのほうがcomposableで筋が良いように思えますが、tool -> helixの連携で課題があり採用しませんでした。
このアプローチではTurning Helix into an IDE with the help of WezTerm and CLI toolsが参考になりました。
File explorerの表示
Helix(hx command)起動時から編集対象のfileが表示されるまでの詳しい説明はHelixがfileをrenderingする仕組みを理解するで書きました。
概要としては以下のようにEditorViewがterminalに対するrenderingを行うので、そこにfile exploerを差し込みます。
Helixの各種componentはhelix_term::compositor::Component traitを実装します。
pub trait Component: Any + AnyComponent {
    /// Process input events, return true if handled.
    fn handle_event(&mut self, _event: &Event, _ctx: &mut Context) -> EventResult {
        EventResult::Ignored(None)
    }

    /// Render the component onto the provided surface.
    fn render(&mut self, area: Rect, frame: &mut Surface, ctx: &mut Context);

    /// ...
}上記のようにuserのkey入力の処理を行うhandle_event()やterminalに描画を行うrender()の実装が要求されます。
impl Component for EditorView {
    fn render(&mut self, area: Rect, surface: &mut Surface, cx: &mut Context) {
      // ...
    }
}Component::render()の引数として以下が与えられます。
Rect: 各componentがrenderすべき領域(x,y座標とwidth,heightを保持)&mut Surface: terminalに描画されるbuffer&mut Context: editorの状態や設定へのaccessを提供
pub struct EditorView {
    // ...
    pub(crate) explorer: Option<Explorer>,
}

impl Component for EditorView {
    fn render(&mut self, area: Rect, surface: &mut Surface, cx: &mut Context) {
        // ...

        if let Some(explorer) = self.explorer.as_mut() {
            // ...
            explorer.render(area, surface, cx);
        }
        // ...
    }
}EditorView::render()では自身が今回追加するExplorerを保持していればそのrender()を呼ぶという分岐が入っています。
これを行うのが、reveal_current_file commandです。defaultの設定ではSpace+eで実行できます。
独自のcommandを追加するにはhelix_term::keymap::default::default()に追加します。
pub fn default() -> HashMap<Mode, KeyTrie> {
    let normal = keymap!({ "Normal mode"
        // ...
        "space" => { "Space"
            "f" => file_picker,
            "F" => file_picker_in_current_directory,
            // ...
            "e" => reveal_current_file, // 👈
    })
    // ...
}このkeymap! macroにcommandの起動sequenceを渡すとSpace+eで渡したcommand(関数)を呼び出すことができます。
これはあくまでdefaultの設定で、設定fileから以下のようにすると上書きすることもできます。
[keys.normal.space]
E = "reveal_current_file"(設定fileは:config-openで開くことができ、:config-reloadで反映できます)
reveal_current_file()は下記のように実装されています。
fn reveal_file(cx: &mut Context, path: Option<PathBuf>) {
    cx.callback = Some(Box::new(
        |compositor: &mut Compositor, cx: &mut compositor::Context| {
            let Some(editor) = compositor.find::<ui::EditorView>() else { return };

            (|| match editor.explorer.as_mut() {
                Some(explorer) => match path {
                    Some(path) => explorer.reveal_file(path),
                    None => explorer.reveal_current_file(cx),
                },
                None => {
                    editor.explorer = Some(ui::Explorer::new(cx)?);
                    editor.explorer.as_mut().unwrap().reveal_current_file(cx)?;
                    Ok(())
                }
            })()
            .unwrap_or_else(|err| cx.editor.set_error(err.to_string()))
        },
    ));
}

fn reveal_current_file(cx: &mut Context) {
    reveal_file(cx, None)
}ここで、callbackとして設定しておくとevent handlingで呼んでもらえます。
Compositorは各種componentを管理するstructで、そこからEditorViewを取得し、Explorerが保持されていなければ生成します。
これで、Space+eを押すとExplorerが生成され、render()処理が呼ばれることがわかりました。
Explorer::render()
Explorerはdirectory構造を描画するためのcomponentで、以下のように定義されています。
pub struct Explorer {
    tree: TreeView<FileInfo>,
    state: State,
    prompt: Option<(PromptAction, Prompt)>,
    // ...
}TreeViewはdirectory構造を保持するstructです。FileInfoは必要なfilesystemへのaccessを抽象化しています。Stateはuiの状態を保持しており、表示されているかや、focusの有無を管理しています。Option<(PromptAction,Prompt)>はfileの作成やrename時の入力を保持しています。
実際のfile explorerのrenderingは以下のように定義されています。
impl Component for Explorer {
    // ...
    fn render(&mut self, area: Rect, surface: &mut Surface, cx: &mut Context) {
        if area.width < 10 || area.height < 5 {
            cx.editor.set_error("explorer render area is too small");
            return;
        }
        self.render_embed(area, surface, cx);
    }
    // ...
}

impl Explorer {
    // ...
    fn render_embed(&mut self, area: Rect, surface: &mut Surface, cx: &mut Context) {
        if !self.state.open {
            return;
        }
        let width = area.width.min(self.column_width + 2);

        // for command prompt
        let side_area = Rect { width, ..area }.clip_bottom(1);
        let background = cx.editor.theme.get("ui.background");
        surface.clear_with(side_area, background);

        let prompt_area = area.clip_top(side_area.height);

        let list_area =
            render_block(side_area.clip_left(1), surface, Borders::RIGHT).clip_bottom(1);

        self.render_tree(list_area, prompt_area, surface, cx);

        if let Some((_, prompt)) = self.prompt.as_mut() {
            prompt.render_prompt(prompt_area, surface, cx)
        }
    }
}render_embed()の引数のareaはEditorViewも含めたterminal全体を指しており、そこから左側にfile treeを描画する領域を作っています。
Rect::clip_xxx()は描画領域を削る役割をもち、clip_bottom(1)をすると、描画領域が下から1行短くなります。cx.editor.theme.get("ui.background")は現在のbackground用のStyleを動的に取得します。(themeは:themeで変更できます)surface.clear_with()は指定範囲にStyleを適用します。let prompt_area = area.clip_top(side_area.height)でterminal全体の下1行を確保しています。ここにfileを削除しますか?といったpromptを表示しますlet list_area = render_block(side_area.clip_left(1), surface, Borders::RIGHT).clip_bottom(1)でfile explorer領域にborderを描画していますself.reder_tree(list_are, prompt_area, surface, cx)指定した領域にdirectory構造を描画しますprompt.render_prompt(prompt_area, surface, cxuserに表示すべきpromptがあれば描画します。Promptはすでにhelixに実装されています
各領域は概ね以下のようになっています。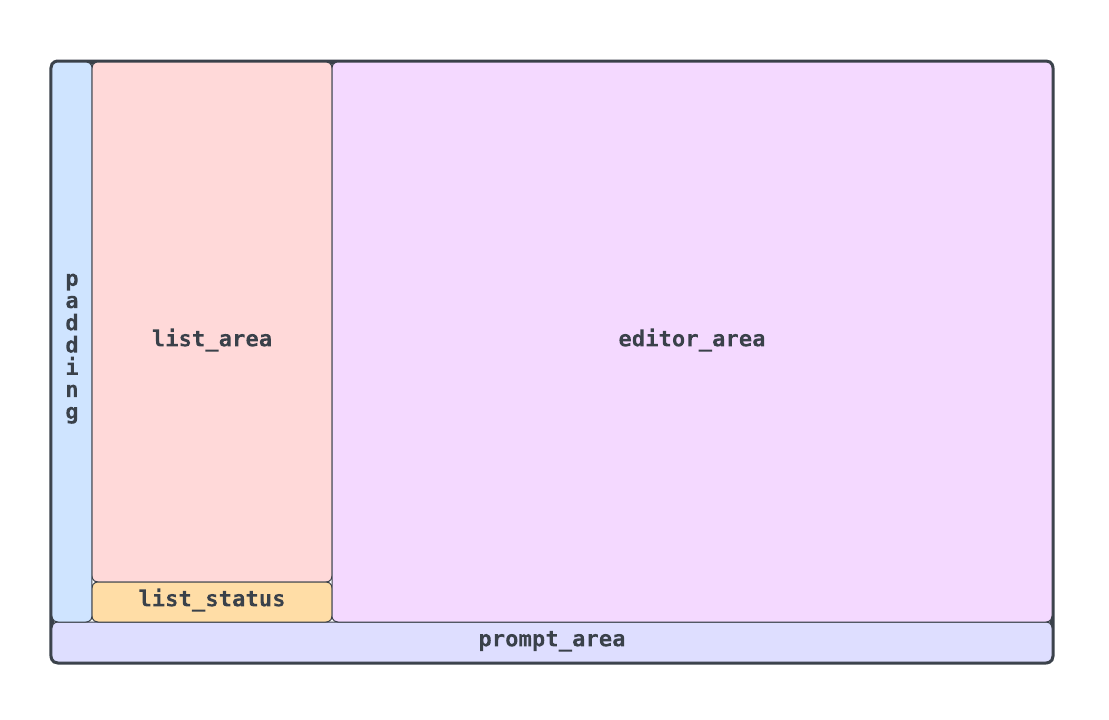
TreeView::render()
最終的にTreeView::render()で実際のdirectory構造がrenderingされます。
impl<T: TreeViewItem + Clone> TreeView<T> {
    pub fn render(
        &mut self,
        area: Rect, // list_area
        prompt_area: Rect,
        surface: &mut Surface,
        cx: &mut Context,
    ) {
        let style = cx.editor.theme.get("ui.text");

        let ancestor_style = {
          // ...
        };

        // ここでfilesystemからdirectory entryを取得し、選択されている等の状態を加味して
        // 表示すべきentryを生成します。
        let iter = self.render_lines(area).into_iter().enumerate();

        for (index, line) in iter {
            // 1 entryごとに描画するので、y軸をiteration毎に加算しています
            let area = Rect::new(area.x, area.y.saturating_add(index as u16), area.width, 1);
            let indent_len = line.indent.chars().count() as u16;

            // directory階層を表現するためのindentを描画
            // set_stringn()は文字列描画用のhelper
            surface.set_stringn(
                area.x,
                area.y,
                line.indent.as_str(),
                indent_len as usize,
                style,
            );

            // 選択状態を表現するためのstyle
            let style = if line.selected {
                style.add_modifier(Modifier::REVERSED)
            } else {
                style
            };
            // indentは描画したのでx軸を調整
            let x = area.x.saturating_add(indent_len);

            // directory entryを描画
            surface.set_stringn(
                x,
                area.y,
                line.content.as_str(),
                // file名が描画領域をはみ出さないように調整
                area.width
                    .saturating_sub(indent_len)
                    .saturating_sub(1)
                    .into(),
                if line.is_ancestor_of_current_item {
                    ancestor_style
                } else {
                    style
                },
            );
        }
    }
}
これでついにdirectory構造が描画できました。
surface.set_stringn()にfileの種別に応じたiconを渡せば、より一般的なfile explorerに近づきそうです。
やってみようかとも思ったのですが、Helix本体でiconの管理方法が議論されているので、それを待ってからにすることにしました。
移動
Directory構造を描画できたので、次はfile explorer上での移動を実装します。
基本的には、userがfile explorerをfocusしているかを管理して、focusしている場合はjが押されたら現在のfile explorer上の選択を下に一つ移動させる。というような処理を追加します。
まずは先ほどと同様にEditorViewからです。
impl Component for EditorView {
    fn handle_event(
        &mut self,
        event: &Event,
        context: &mut crate::compositor::Context,
    ) -> EventResult {
        if let Some(explorer) = self.explorer.as_mut() {
            if let EventResult::Consumed(callback) = explorer.handle_event(event, context) {
                return EventResult::Consumed(callback);
            }
        }
        // ...
    }
}とりあえず雑にeventをExplorerに渡しています。
Eventが処理できたら、EventResult::Consumed()でそれを表現します。eventがconsumeされた場合は、EditorViewとしてはそこでevent handlingを終了します。
Plugin機構がないため、各種処理にhookをはさめないので、event handlingの先頭にifを追加するという力技です。
移動はTreeView::handle_event()で処理されます。
impl<T: TreeViewItem + Clone> TreeView<T> {
    pub fn handle_event(
        &mut self,
        event: &Event,
        cx: &mut Context,
        params: &mut T::Params,
    ) -> EventResult {
        let key_event = match event {
            Event::Key(event) => event,
            _ => return EventResult::Ignored(None),
        };
        (|| -> Result<EventResult> {
            match key_event {
                key!('j') => self.move_down(1),
                key!('k') => self.move_up(1),
                key!(Enter) => self.on_enter(cx, params, self.selected)?,
                // ...

                _ => return Ok(EventResult::Ignored(None)),
            };
            Ok(EventResult::Consumed(None))
        })()
        .unwrap_or_else(|err| {
            cx.editor.set_error(format!("{err}"));
            EventResult::Consumed(None)
        })
    }
    fn move_up(&mut self, rows: usize) {
        self.set_selected(self.selected.saturating_sub(rows))
    }

    fn move_down(&mut self, rows: usize) {
        self.set_selected(self.selected.saturating_add(rows))
    }
}ここで移動に対応するkey(j|k)だった場合は自身の状態を更新します。
現在選択中のentryはTreeView.selectedで保持しています。
keyをhard codeしないで設定から動的に取得してもよいのですが、自分専用なのでできるだけメンテするcodeを減らそうとしています。
Enterが押された場合はTreeView::on_enter()でeditorに当該fileが表示されます。
起動中のhelixに外から特定のfileを開かせるAPIは現状ないので、Editor::open()を直接よびだせるcode levelの統合にメリットがあります。
Fileの変更
最後にfile explorerからfileをcreate, delete, renameできるようにします。
impl Component for Explorer {
    fn handle_event(&mut self, event: &Event, cx: &mut Context) -> EventResult {
        // key入力にだけ関心がある
        let key_event = match event {
            Event::Key(event) => event,
            _ => return EventResult::Ignored(None),
        };
        // focusされていない場合はeditor側の操作であるとし、early returnする
        if !self.is_focus() {
            return EventResult::Ignored(None);
        }

        // file作成時は作成したいfile名を入力してもらう必要があるので
        // userの入力をpromptに渡す必要がある
        // handle delete | rename prompt
        if let EventResult::Consumed(c) = self.handle_prompt_event(key_event, cx) {
            return EventResult::Consumed(c);
        }

        (|| -> Result<()> {
            match key_event {
                key!(Esc) => self.unfocus(),
                key!('q') => self.close(),
                key!('a') => self.new_create_file_or_directory_prompt(cx)?,
                key!('d') => self.new_remove_prompt()?,
                key!('r') => self.new_rename_prompt(cx)?,
                _ => {
                    self.tree
                        .handle_event(&Event::Key(*key_event), cx, &mut self.state);
                }
            };
            Ok(())
        })()
        .unwrap_or_else(|err| cx.editor.set_error(format!("{err}")));

        EventResult::Consumed(None)
    }
}作成はa, deleteはd, renameはrを割り当てています。
例えば、file explorerをfocus中にaを押すと、以下のように作成するfileを受け付けるpromptが表示されます。
    fn new_create_file_or_directory_prompt(&mut self, cx: &mut Context) -> Result<()> {
        let dir_path = self.nearest_directory()?;
        self.prompt = Some((
            PromptAction::CreateFileOrDirectory,
            Prompt::new(
                format!(
                    "📝 New file or directory (ends with '{}') ",
                    std::path::MAIN_SEPARATOR
                )
                .into(),
                None,
                ui::completers::none,
                |_, _, _| {},
            )
            .with_line(format!("{}/", dir_path.display()), cx.editor),
        ));
        Ok(())
}promptの作成は自身のfieldにPromptと要求されたactionのenumを保持することで行います。
promptは上記のprompt_areaに描画します。prompt中はExplorer::handle_prompt_event()で入力を処理します。
impl Explorer {
    fn handle_prompt_event(&mut self, event: &KeyEvent, cx: &mut Context) -> EventResult {
        let result = (|| -> Result<EventResult> {
            let (action, mut prompt) = match self.prompt.take() {
                Some((action, p)) => (action, p),
                _ => return Ok(EventResult::Ignored(None)),
            };
            let line = prompt.line();

            let current_item_path = self.tree.current()?.item().path.clone();
            match (&action, event) {
                (PromptAction::CreateFileOrDirectory, key!(Enter)) => {
                    if line.ends_with(std::path::MAIN_SEPARATOR) {
                        self.new_directory(line)?
                    } else {
                        self.new_file(line)?
                    }
                }
                (PromptAction::RemoveDirectory, key) => {
                    if let key!('y') = key {
                        close_documents(current_item_path, cx)?;
                        self.remove_directory()?;
                    }
                }
                (PromptAction::RemoveFile, key) => {
                    if let key!('y') = key {
                        close_documents(current_item_path, cx)?;
                        self.remove_file()?;
                    }
                }
                (PromptAction::RenameFile, key!(Enter)) => {
                    close_documents(current_item_path, cx)?;
                    self.rename_current(line)?;
                }
                // cancel
                (_, key!(Esc)) => {}
                // continue input
                _ => {
                    prompt.handle_event(&Event::Key(*event), cx);
                    self.prompt = Some((action, prompt));
                }
            }
            Ok(EventResult::Consumed(None))
        })();
        match result {
            Ok(event_result) => event_result,
            Err(err) => {
                cx.editor.set_error(err.to_string());
                EventResult::Consumed(None)
            }
        }
}
なお、helix側で管理していたfileを削除する際は、helix本体のcleanup処理を呼ぶ必要があります。
このあたりは最新のmasterを反映する際に後処理の正しさに責任をもつ必要があります。
使い方
最後に今回forkして変更したexplorer版helixはNix userであれば以下のようにして利用できます。
nix profile install github:ymgyt/helix/explorerまとめ
簡単にですが、Helixにfile explorerを移植した際の概要について書いてみました。
自前のcomponentを追加することで、内部構造が少しだけわかり楽しかったです。